View
A view is a stored SELECT of one or more tables. The rows to be returned are defined by the SELECT statement that lists columns from the source tables. Only the view definition is stored in the database, it does not directly represent physically stored data. The WHERE command can also be used. A view has no input parameters.
A view can be likened to a virtual table. It can be treated, in almost all respects, as if it were a table, using it as the basis for queries and even updates in some cases. It is possible to perform SELECT, PROJECT, JOIN and UNION operations on views as if they were tables.
Views give end users a personalized version of the underlying tables in the database and also simplify data access, by protecting them from the details of how information is spread across multiple tables. They also provide security by hiding certain columns in the table(s) from various users. Firebird/InterBase® allows user rights to be granted to the view and not the underlying table(s).
Advantage of views (and stored procedures): as these are part of Firebird or InterBase®, it is irrelevant which front end is subsequently used, be it Delphi, PHP or other.
They allow the developer to denormalize data, combining information from two or more tables into a single virtual table. Instead of creating an actual table with duplicate data, a view can be created using SELECT, JOIN and WHERE. Even when you change the underlying structure of the tables concerned, the view remains consistent.
Views cannot be sorted, they merely display the result of a specified SELECT. (A view can therefore be compared to a saved query). The ORDER BY instruction cannot be used in a view (the data sets are displayed as determined by the optimizer, which is not always intelligent!). In such a case, a stored procedure would have to be used (stored procedures being more flexible in any case, and offering more control).
Views can be used, for example, for internal telephone lists, or when information from more than one table needs to be linked, e.g. the first modular result needs to be linked to the second result.
The underlying SELECT definition can contain all the performance features of a select query on tables, it is however subject to the following restrictions:
- All columns must be explicitly specified, so that the view always returns the same columns in the correct order.
- If reference is made to a SELECT * statement in a view, the result is returned in the column sequence of the definition of the underlying tables, and can therefore deliver different results should changes later be made to the table structure.
- No ORDER BY statements may be used.
- Indices can only be placed on the columns of the base tables, not the view columns. When the view is generated, these indices are automatically used.
- A view column definition can contain one or more columns based on an expression that combines the outcome of two columns. The expression must return a single value, and cannot return an array or array element. If the view includes an expression, the view column option is required.
Note: Any columns used in the value expression must exist before the expression can be defined.
- WITH CHECK OPTION enables Firebird/InterBase® to verify that a row added to or updated in a view is able to be seen through the view before allowing the operation to succeed. Do not use WITH CHECK OPTION for read-only views.
Note: You cannot select from a view that is based on the result set of a stored procedure.
Views allow a data modularization, particularly useful with complex data quantities, as another view can be incorporated in the view definition.
The user who creates a view is its owner and has all privileges for it, including the ability to GRANT privileges to other users, roles, triggers, views, and stored procedures. A user may have privileges to a view without having access to its base tables. When creating views:
- A read-only view requires SELECT privileges for any underlying tables.
- An updatable view requires ALL privileges to the underlying tables.
If you are new to database development, please refer to the chapter Understanding and using views.
New view / View Editor
A new view can be created in a connected database, either by using the menu item Database / New View, the respective icon in the New Database Object toolbar, or using the DB Explorer right mouse button (or key combination [Ctrl + N]), when the view heading of the relevant connected database is highlighted.
Alternatively, a new view can be created directly in the IBExpert SQL Editor, and then saved as a view.
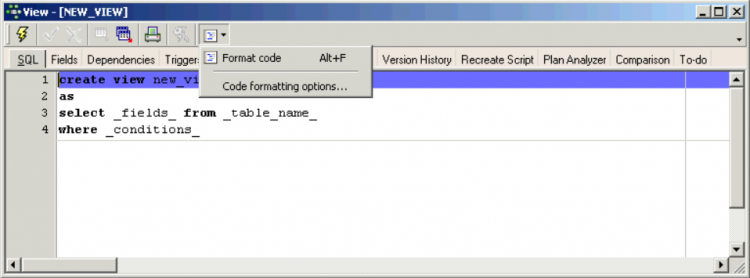
A New View dialog appears, with its own toolbar:
The view can be created directly in the SQL dialog, and subsequently committed using the respective icon or [Ctrl + F9].
The Code Formatter enables you to format the source code of views, triggers and stored procedures. Code formatting options … allows you to customize a range of specifications for all or for individual statements. Please refer to the IBExpert Options menu item, Code formatting options ... for further information.
SQL
When creating a view it is necessary to define a view name that is unique in the database. All data manipulation operations such as SELECT, INSERT, UPDATE and DELETE are carried out using this name.
The view can then be created in the SQL dialog using the following syntax:
CREATE VIEW ViewName (<List_of_field_names>)
AS
SELECT <fields_ from _table_name>
[WITH CHECK OPTION];
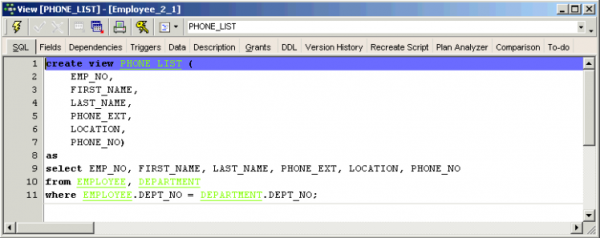
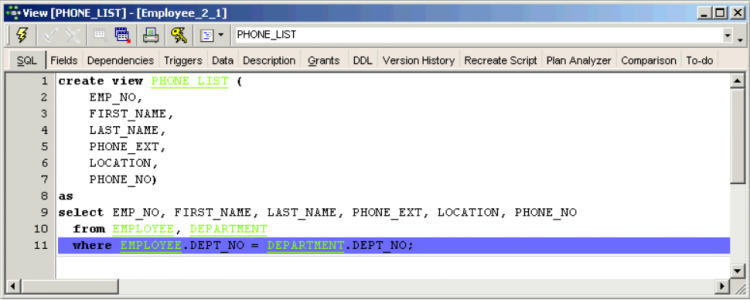
An example can be viewed in the Firebird/InterBase® sample EMPLOYEE database:
The view name must be unique. As Firebird/InterBase® only stores the view definition (i.e. it does not copy the data from the tables into the view), views depend a lot upon indices set in the base tables, in order to locate data rapidly from the original tables. It is therefore important to analyze views carefully, and place indices on those columns that are used to join tables and to restrict rows.
The tables and fields can be easily inserted into the SQL script by dragging the relevant table and field names from the DB Explorer and SQL Assistant, and dropping them in the respective position in the SQL dialog in the New View Editor. After naming the view fields and inserting the relevant base table fields, the new view can be committed using the respective icon or [Ctrl + F9].
The view contents result from the returns of the SELECT statement that corresponds, with few exceptions, to the SQL SELECT command. The SELECT statement specifies which tables, columns and rows are to be returned as part of the view.
If the view is an updatable view, the optional WITH CHECK OPTION parameter may also be used to control data input.
The field names, as they are to appear in the view, can be optionally specified under a different name to the field names in the base tables. If no specification is made, the original base table column names automatically become the view field names. If column names are specified, they must be unique within the view and a name must be specified for every column returned by the view (even if some of the view field names correspond to the original field names). Please note that if the SELECT statement includes derived columns, column names must be specified.
If the view is to be used as part of a query, or indeed any other SQL statement, Firebird/InterBase® queries the original data directly. This important feature offers the flexibility of being able to make alterations to the underlying database structure without affecting the user's view of the data or the view of any programs, which reference the view instead of the base tables.
Finally compile the new view using the respective toolbar icon or [F9], and, if desired, autogrant privileges, again using the respective toolbar icon or key combination [Ctrl + F8].
Fields
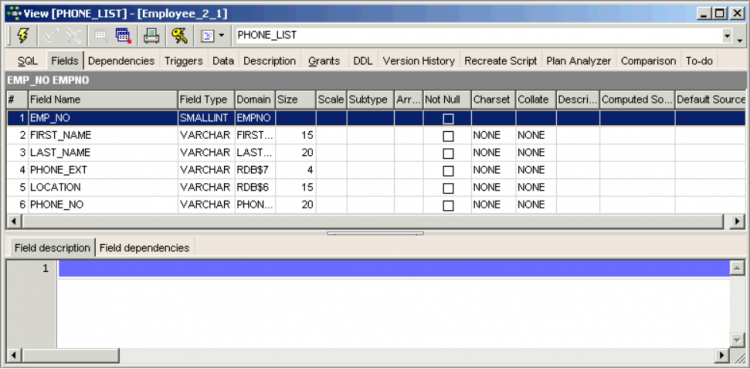
The Fields page displays the fields selected from the base table (with their new view names, if they have been specified), along with their properties.
The individual fields may not be edited directly from this dialog; to alter fields, please refer to the Table Editor / Fields. These fields can however be sorted here into ascending or descending order based upon the column where the mouse is, by clicking on the column headers (i.e. Field Name etc.). By double-clicking on the right edge of the column header, the column width can be adjusted to the ideal width.
In the lower part of the View Editor the individual Field Descriptions and Field Dependencies can be viewed. The field dependencies list includes indices, primary and foreign keys and the dependencies of referenced tables.
The Fields page offers the same right-click context-sensitive menu as the Table Editor menu.
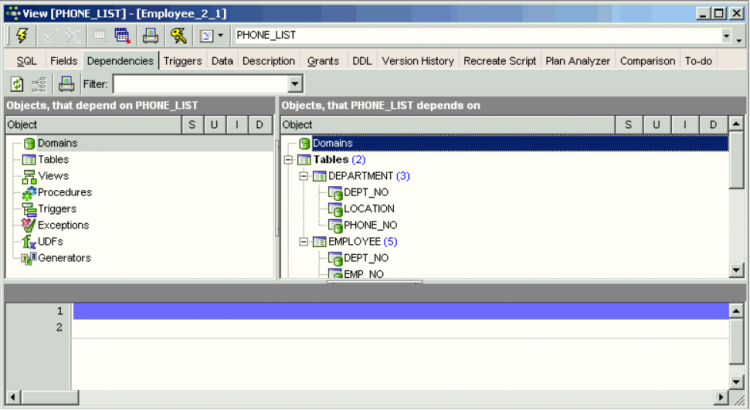
Dependencies
Please refer to Table Editor / Dependencies.
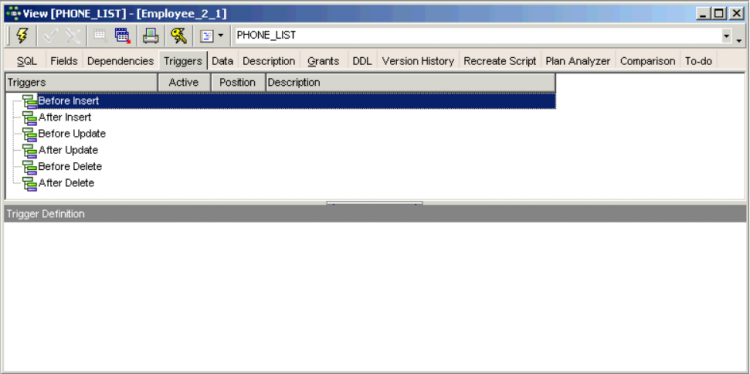
Triggers
Please refer to Table Editor / Triggers.
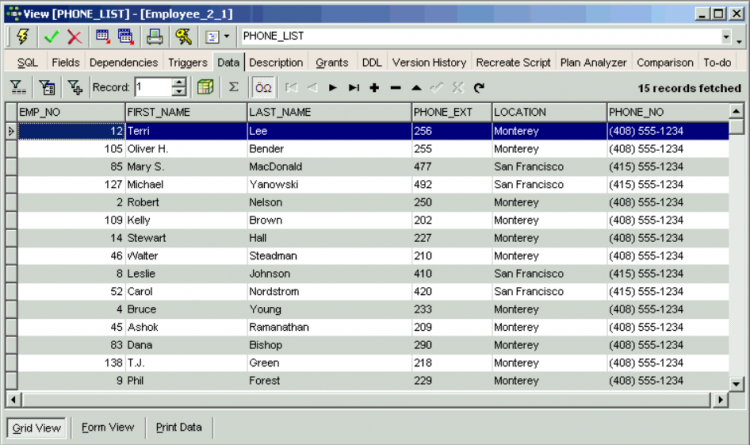
Data
Please refer to Table Editor / Data. The Data page can also be opened directly from the DB Explorer when a table or view is selected, using the right-click context-senstive menu or [F9]. Please note that data may only be manipulated in this dialog if the view is defined as, and meets all conditions required by an updatable view.
Exporting view data into a number of different file formats, and exporting view data into file, clipboard or the IBExpert Script Executive, please refer to Export Data and Export data into script respectively.
Description
Please refer to Table Editor / Description.
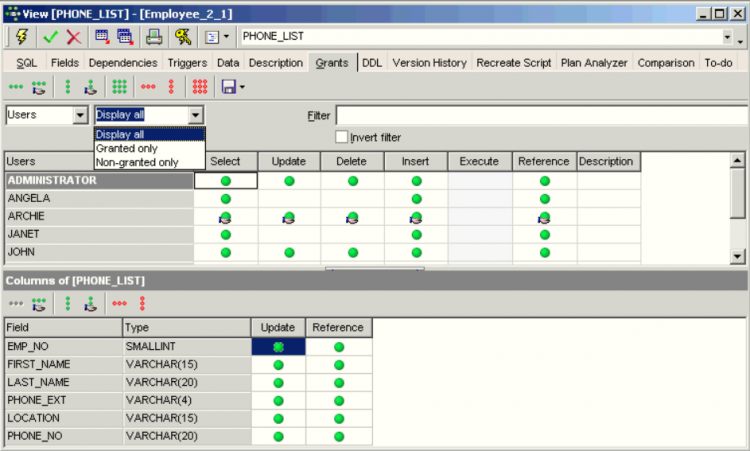
Grants
Please refer to Table Editor / Grants.
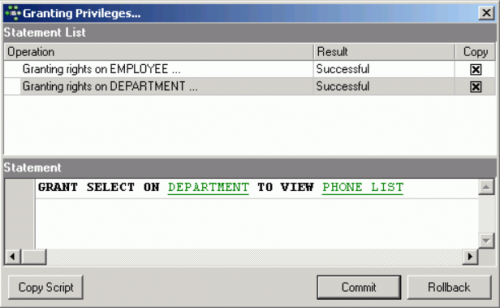
Autogrant Privileges
The Autogrant Privileges icon
can be found in the View Editor toolbar, Procedure Editor toolbar and Trigger Editor toolbar. Privileges can also be autogranted using the key combination [Ctrl + F8]. It allows all privileges to be automatically granted for views, procedures and triggers.
(This feature is unfortunately not included in the free IBExpert Personal Edition.)
This assigns all rights for newly created objects for all users, and helps to prevent the frequent problem that developers often initially create multitudes of objects for their new database, and suddenly realize that they have not assigned any rights for these views, triggers or procedures.
For those preferring to limit the assignment of rights, please use the Grants page, offered in the majority of object editors, or the IBExpert Tools / Grant Manager.
SELECT statements with a WITH LOCK clause are granted an UPDATE privilege on the affected table.
Under the IBExpert Options menu item, Environment Options / Tools the default option, Autogrant privileges when compiling procedures, triggers and views, needs to be checked, for this function to work. It is also possible to specify here whether existing privileges should first be deleted, before new ones are granted.
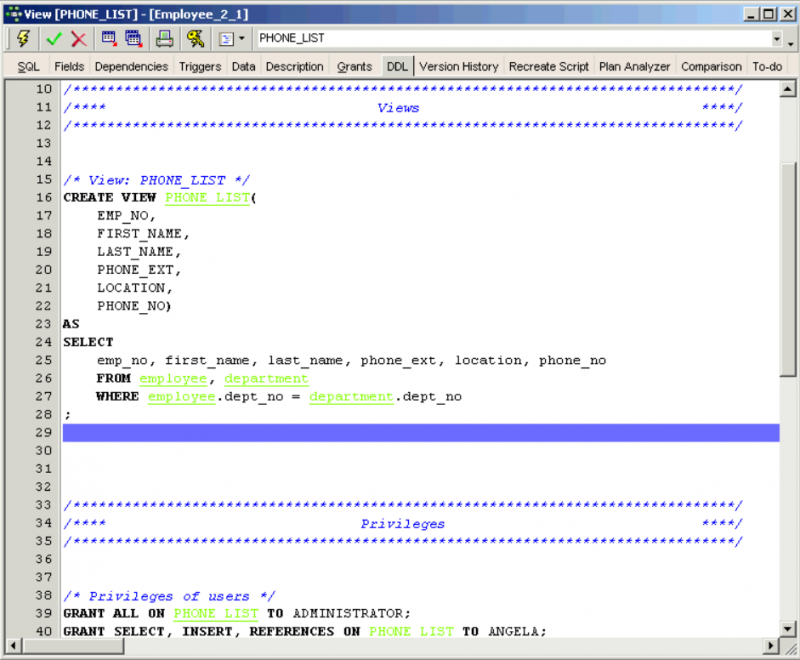
DDL
Please refer to Table Editor / DDL.
Version History
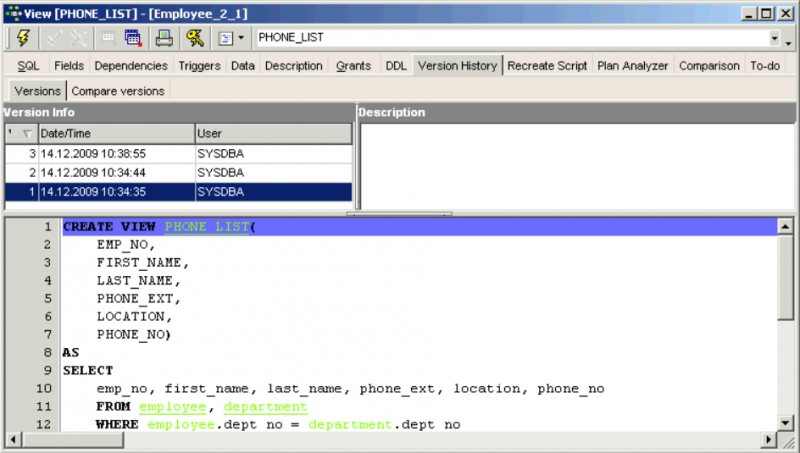
The Version History page offers a unique and automatic documentation. It is available in the View Editor, Procedure Editor and Trigger Editor. It displays different versions of the view, procedure or trigger (if existent), and lists the dates when changes were made, along with the person(s) responsible.
The first time the Version History is opened, IBExpert asks for confirmation, as it needs to create certain system tables for the version history logging. This only needs to be confirmed once. After this the Version History appears immediately in all relevant editors, and all object changes are automatically stored.
Versions listed in the Version Info panel can be marked, and deleted using the right mouse click menu (key combinations: Delete version [Del]; Remove duplicates [Shift + Ctrl + Del]).
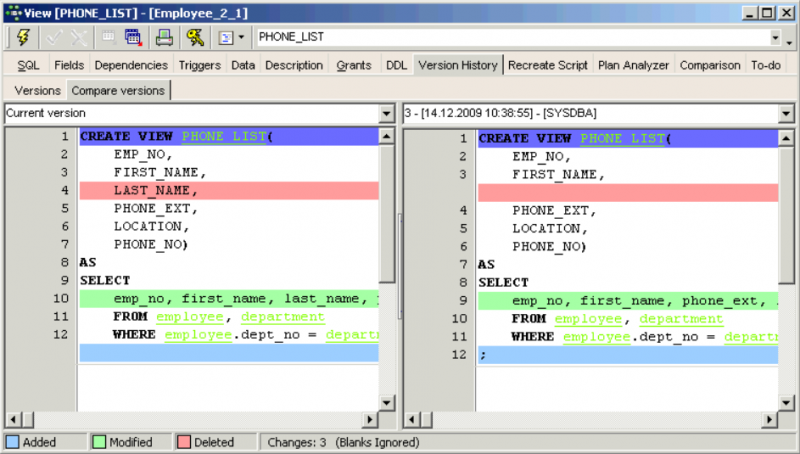
The SQL scripts of the different versions can even be compared, on the Compare Versions page.
The pull-down list at the top of the two script panels allows different versions to be selected, without having to switch back to the Versions page. Alterations are highlighted by colored bars, marking the line where an alteration has been made. The color code key can be viewed in the dialog's status bar, along with a note of the number of changes made between the two versions.
If the IBE$VERSION_HISTORY table already exists in your database you should add the following changes manually if you need to log the client address and the RDB$GET_CONTEXT function is available:
New column in the IBE$VERSION_HISTORY table:
   ALTER TABLE IBE$VERSION_HISTORY ADD IBE$VH_CLIENT_ADDRESS VARCHAR(32) CHARACTER
   SET NONE;
Additional line of code in IBE$VERSION_HISTORY_BI trigger:
NEW.IBE$VH_CLIENT_ADDRESS = RDB$GET_CONTEXT('SYSTEM', 'CLIENT_ADDRESS');
Recreate Script
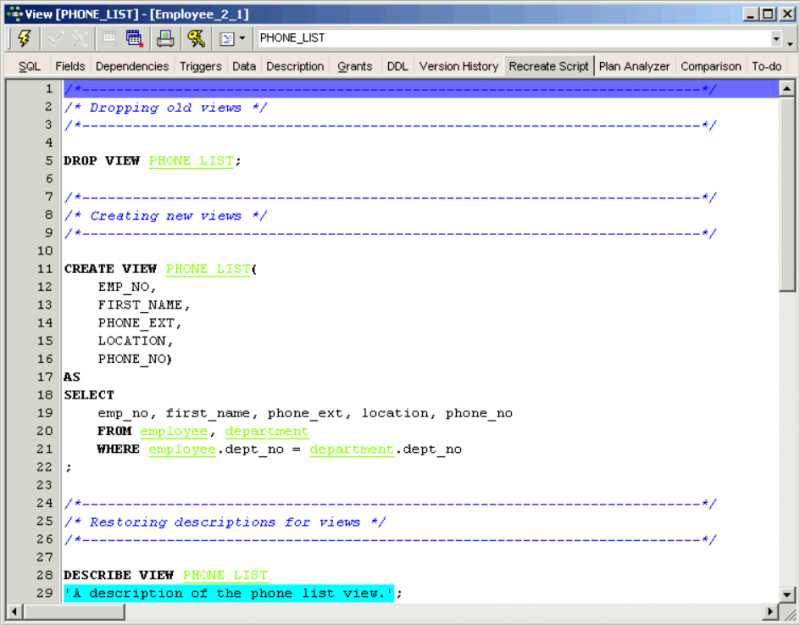
The Recreate Script page displays the full SQL script for the view, beginning with the DROP VIEW command, and then recreating the current view. This is useful should errors arise in a view where it is almost impossible, due to the complexity of the view or the multitude of different versions, to detect the source.
The script can even be edited directly in this dialog, and the changes committed. The right-click menu is the same as that in the SQL Editor, allowing a number of further operations directly on the SQL script (please refer to SQL Editor Menu).
Plan Analyzer
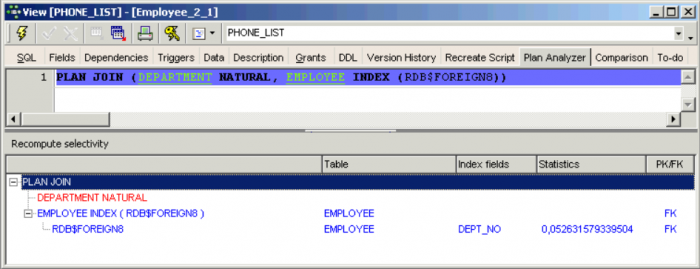
Please refer to SQL Editor / Plan Analyzer. Please note that the performance information is not available here in the View Editor's Plan Analyzer.
Comparison
Please refer to Table Editor / Comparison.
To-Do
Please refer to Table Editor / To-Do.
Updatable views and read-only views
The simplest and quickest way to create an updatable view is to use the Create View from Table option in the IBExpert Table Editor, and create a trigger (checkbox options to create BEFORE INSERT, BEFORE UPDATE or BEFORE DELETE). Complete the trigger text in the lower code editor window (taking into consideration the notes below), and the updatable view is complete!
If the view is to be an updatable view, the optional parameter WITH CHECK OPTIONS needs to be used to control data input. If this parameter is used, only those values corresponding to the view's SELECT statement may be input. A view needs to meet all of the following conditions if it is to be used to update data in the base table:
- The view is based on a single table or on another updatable view. Joined tables result in a read-only view. (The same is true if a subquery is used in the SELECT statement.)
- Any columns in the base table that are not part of the view allow NULLs. This condition requires that the base table's primary key be included in the view.
- The SELECT statement does not include a DISTINCT operator. This restriction might have the effect of removing duplicate rows, making it impossible for Firebird/InterBase® to determine which row to update.
- The SELECT statement does not contain joined tables.
In a normalized database, a view is usually updatable if it is based on a single table and if the primary key column or columns are included in the view definition.
However it is possible to input data into a view and then allocate the new data / data changes to several individual tables by using a combination of user-defined referential constraints, triggers, and unique indexes.
Specifying a view with the CHECK OPTION
If a view is updatable, INSERT, UPDATE, or DELETE operations can be made on the view to insert new rows into the base table(s), or to modify or delete existing rows.
However, the update could potentially cause the modified row to no longer be a part of the view, and what happens if the view is used to insert a row that does not match the view definition?
To prevent updates or inserts that do not match the WHERE condition of the view, the WITH CHECK OPTION needs to be specified after the view's SELECT statement. This clause tells Firebird/InterBase® to verify an UPDATE or INSERT statement against the WHERE condition. If the modified or inserted row does not match the view definition, the statement fails and Firebird/InterBase® returns an error.
Edit view/alter view
A view can be altered in the View Editor, opened by double-clicking on the view name in the DB Explorer. Alternatively use the DB Explorer's right mouse-click menu item Edit View or key combination [Ctrl + O].
Alterations may be made directly in the SQL input page; fields, dependencies and triggers can be examined in their respective pages before field deletion. Pre-Firebird 2.5 the only way to alter a view was to drop the view definition and recreate it, or as IBExpert has done, create a new view of the same name as the old one, replacing it after committing.
Firebird 2.5 offers both the ALTER VIEW and CREATE OR ALTER VIEW. ALTER VIEW enables a view definition to be altered without the need to recreate (drop and create) the old version of the view and all of its dependencies. With CREATE OR ALTER VIEW, the view definition will be altered (as with ALTER VIEW) if it exists, or created if it does not exist.
Syntax
create [ or alter ] | alter } view <view_name>
  [ ( <field list> ) ]
as <select statement>
Example
create table users (
  id integer,
  name varchar(20),
  passwd varchar(20)
);

create view v_users as
  select name from users;

alter view v_users (id, name) as
  select id, name from users;
Source: Firebird 2.5 Release Notes, July 2, 2008
Recreate view
The RECREATE VIEW statement semantics are the same as for other RECREATE statements.
See also:
Drop view/delete view
When a view is dropped it is deleted for good. A view cannot be dropped if it is used elsewhere in the database's metadata. For example, if the view to be dropped is included in the definition of another view, a stored procedure or any CHECK constraint, the dependent object must first be dropped before the view can be dropped. Any existent dependencies can be viewed on the View Editor / Dependencies page. Most database objects can be dropped here directly on the Dependencies page or using the IBExpert Dependencies Viewer (found in the IBExpert Tools menu) by using the right-click menu on the selected object, and choosing the menu item Drop Object or [Ctrl + Del].
To drop a view, use the DB Explorer right mouse button menu item Drop View… (or [Ctrl + Del]) or, if the view is already opened in the View Editor, use the View Editor main menü item, (opened by clicking View in the top left-hand corner), Drop View.
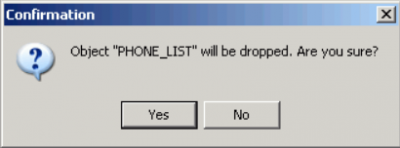
IBExpert asks for confirmation:
before finally dropping the view. Once dropped, it cannot be retrieved.
Alternatively the DROP VIEW statement can be used in IBExpert's SQL Editor. It has the following syntax:
DROP VIEW <view_name>;
For example, to drop the PHONE_LIST view in the sample EMPLOYEE database, the following statement should be issued:
DROP VIEW PHONE_LIST;
Please note that a view can be dropped by its creator, the SYSDBA user, or any user with operating system root privileges.
